
A Guide to Canvas Framing
Have you been on an overseas holiday and have canvases rolled up in your closet or maybe you purchased a canvas online only for it to arrive rolled up in a tube? If the answer is yes, then it is time to get them unrolled and on the wall! Easier said than done I hear you say! With the multitude of options and different framing opinions it can get quite overwhelming and confusing however this guide will give you the knowledge ensure you are getting the correct materials and the perfect frame for your works of art!
Step 1: Information on mounting your Canvas
There are two different ways that you can mount your canvas in order to hang it on the wall. Firstly, you can stretch the canvas over what is commonly called a stretcher bar. This is a solid wood frame that sits underneath the canvas and the canvas is pulled tightly over the bar and stapled to the back, essentially making the canvas frameless. This is the correct way to mount a canvas and this technique is used in all art galleries. However, it some instances you may not be able to stretch your canvas. This could be because there is not enough canvas to pull around the stretcher bar and too much of the artwork will be lost, or due to poor quality canvases used in some tourist destinations the canvas maybe too brittle or thin to withstand the stretching process. Therefore, in these cases you may opt to glue the canvas to a wooden board or stick it down on an adhesive foam core backing and then place a frame around the outside. This method should only be used if there is no other option to mount your canvas.
When collecting quotes for canvas stretching, it is important to not only ask for a price but what size stretcher bar they will be using to stretch your canvas. Although this may not make a lot of sense to you, it will help you decipher the array of different quotes you will receive. Some picture framers will use the cheapest stretcher bar available and place a brace bar in the middle of the canvas so that it will stop it bowing or warping. This is usually only a temporary measure and eventually it will move out of shape and will not sit flush on your wall or in the frame. The quote for this will be on the cheaper end as they will want to secure your business. Quotes that are a little higher that use a larger stretcher bar with no brace are the ones to look for. Using the correct size stretcher bar means that a brace is not required as it is an adequate size to support the tension of the canvas once it is stretched. This is an art gallery standard and one you should look for if you want your canvas to remain in shape for many years to come.
Step 2: Deciding on a Frame
Once your canvas is stretched you have the choice to leave it as a stretched canvas and hang it frameless or you can choose a frame to place around it. Choosing to leave it frameless can work well on some canvases that have a very busy subject matter or sometimes less is more and adding a frame only detracts from the artwork rather than adding to it. If you decide to frame your canvas it is good to note that the frame does not provide any additional structural support, it simply adds style to your canvas and room and/or enhances the subject or colours of the canvas.
Step 3: What type of frame do I choose?
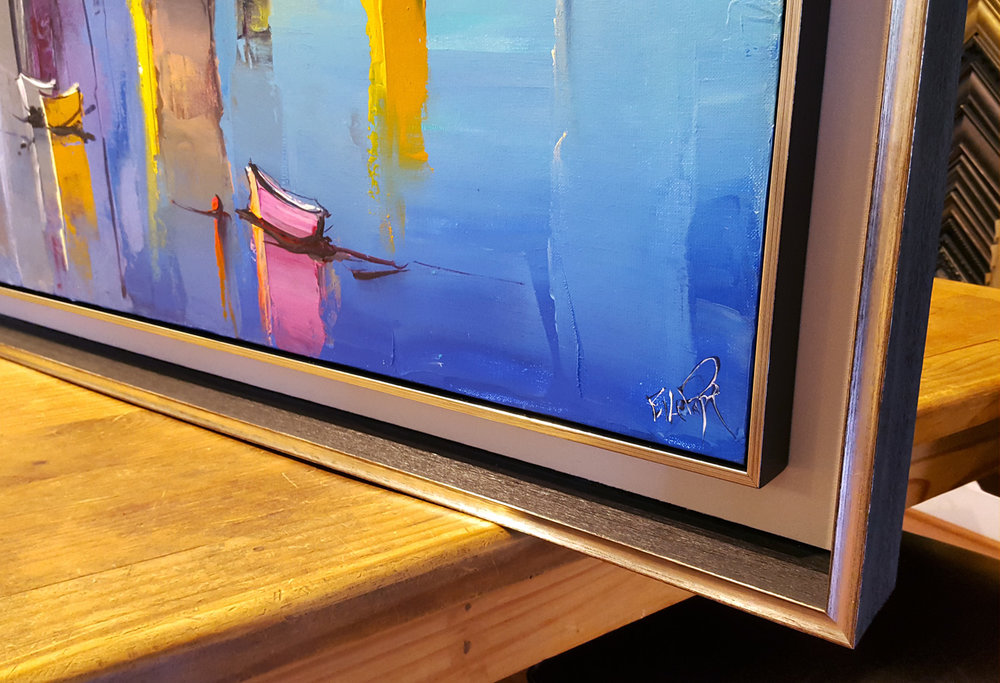
If you decide to add a frame to your stretched canvas you have two choices in regards to the style of the frame. The first one is a unique frame that is made specifically to go around a stretched canvas. Known as an “L-Bar” or “Floating Frame” it gets the L-Bar name from its shape and Floating Frame as the canvas appears to be floating in the frame. This particular frame sits around the outside of the canvas and a small gap can be created between the frame and the canvas, further adding to the floating appearance. It is important to note that this frame does not cover any part of the front of the canvas, unlike a typical frame where the artwork sits inside a rebate. This style is typically used in art galleries and adds a subtle yet stylish addition to the artwork. These frames are typically only 5mm to 10mm wide at the front, but they cover the entire side of the canvas and wrap around the back. These frames are typically plain and usually come in a standard range of colours.
The second option for canvas frames is an ordinary frame that has a large depth to it, so it covers the sides of the canvas. This will give it the same “box” look at the L-Bar but the difference with using this frame is that the frame will cover around 5mm of the front of the canvas, where the artwork sits in the rebate. The advantage of using this type of frame over the L-Bar or Floating Frame is that you will find a bigger choice of colours, textures and styles in these frames since the width of the frame can vary which allows for frame embellishments to be created.
Many people ask why they cannot use an ordinary frame to place around the stretcher bar. The answer is you can, but it isn’t advised for one reason. Imagine you place your newly stretched canvas with a 5cm deep stretcher bar on your hallway wall, so you can admire it every time you walk past it. If you place an ordinary frame around the outside and the frame is not deep enough to cover the stretcher bar, you will see the stretched canvas protruding out the back of the frame which diminishes the look and leaves it looking unprofessional. The only time it is recommended not to use canvas frames and to use an ordinary frame is if the canvas frame is going on a wall that you do not walk past and only see from the front.
So when you find your rolled up canvases in your closet and you are looking around for canvas frames, please take into account the information above and hopefully you will have a professionally framed artwork that will be displayed proudly in your home for many years to come.
